
Board and batten siding is a timeless cladding style that evokes the character of historic barns and farmhouses, yet fits seamlessly into modern architectural designs. Board & batten siding gives a building’s exterior texture and visual intrigue with its crisp lines and dramatic shadow effects. But it’s not just about looks—this siding system also serves a practical purpose by protecting your home from the elements.
Whether you are working on a new build or planning to refresh the exterior of your existing home, this guide will walk you through everything you need to know to From tools and planning to installation, troubleshooting, finishing, and more, install board and batten siding.
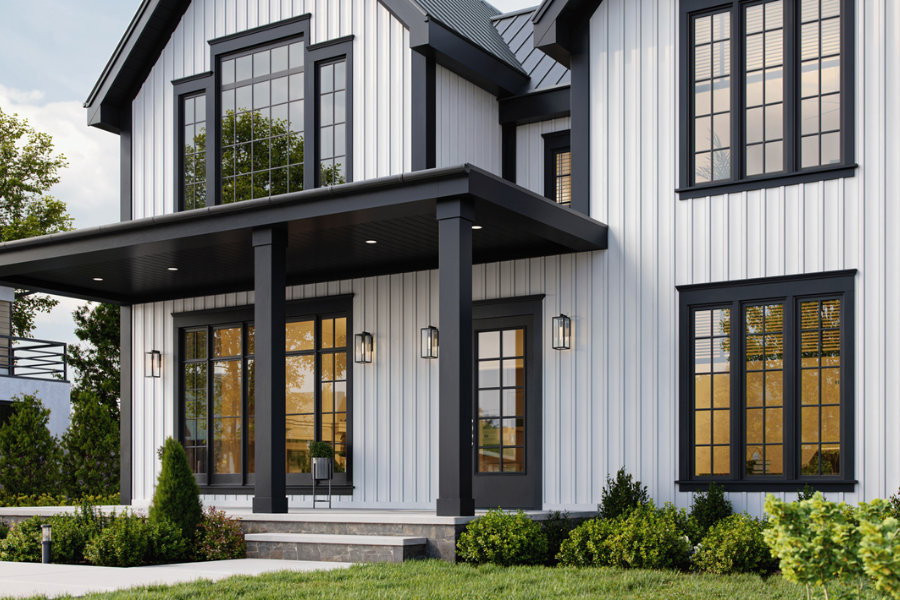
What is Board and Batten Siding?

Board and batten is a vertical siding system that alternates wide boards and narrow strips (battens). The wide boards are typically spaced evenly apart, and the narrow battens are installed over the gaps between the boards, covering the seams and adding dimensional texture.
Originally used in barns for its structural simplicity and affordability, board and batten has evolved into a highly sought-after design for both rustic and contemporary homes. The spacing of boards and battens can be customized to match the aesthetic vision—whether you want a tight, sleek look or a wide, rustic pattern.
Why Choose Board and Batten Siding?
Advantages:
- Visual Interest: Offers texture, depth, and architectural style.
- Versatility: Suitable for all building types—from cabins to modern farmhouses.
- Customizable Design: Board width, batten width, and spacing can be varied.
- Weather Resistance: The overlapping batten system helps shield vertical seams from rain, snow, and wind.
- Cost-Effective (DIY): With basic tools and woodworking skills, it can be installed by most homeowners.
- Durability: When installed correctly, it can last 25–40 years with minimal maintenance.
Materials and Tools Required
To avoid project delays, gather all your materials and tools in advance. Choose high-quality materials for a long-lasting, weather-resistant exterior.
Materials Checklist:
- Vertical siding boards: Typically 10” to 12” wide, can be wood, engineered wood, fiber cement, or composite.
- Battens: Are thin strips that are typically 2″ to 3″ wide.
- Vapor barrier / House wrap: (e.g., Tyvek) to protect the wall sheathing.
- Furring strips (optional): For masonry walls or uneven surfaces.
- Stainless Steel or Galvanised Nails and Screws: To avoid rust and discolouration, use.
- Trim boards: For corners, window and door surrounds.
- Flashing tape: For window/door sealing and added moisture protection.
- Exterior-grade caulk: Paintable, flexible, and waterproof.
- Primer and paint / exterior stain: For finishing wood siding.
- Construction adhesive (optional): For extra hold.
Tools Required:
- Tape measure
- Level and plumb bob
- Chalk line
- Circular saw, table saw, or miter saw
- Nail gun or hammer
- Stud finder
- Caulking gun
- Utility knife
- Ladder or scaffolding
- Safety glasses, gloves, and ear protection
Step-by-Step Installation Process
Step 1: Prepare the Wall
A solid foundation is critical. If your base is flawed, your siding won’t last.
A. Remove Old Siding (if applicable):
Strip down old siding and inspect the sheathing underneath. Replace rotted or broken sheathing with OSB or exterior-grade plywood.
B. Install Sheathing (if needed):
Sheathing adds structural rigidity and provides a nailable base. Plywood or OSB (½” or thicker) is standard. Ensure it’s flush and level.
C. Apply House Wrap:
Cover the sheathing with a water-resistant barrier (WRB). Overlap seams by at least 6 inches horizontally and 12 inches vertically. Tape all seams with compatible flashing tape.
D. Add Furring Strips (if needed):
For masonry, concrete, or irregular surfaces, install vertical furring strips (1×3 or 1×4) spaced 16”–24” apart to create a flat, breathable surface for the siding.
Step 2: Plan Your Layout
Planning is where precision matters most.
A. Measure the Wall:
Measure total height and width. Determine the number of boards and battens based on your preferred spacing (e.g., board every 12”, batten every seam).
B. Determine Batten Placement:
Most battens are centered over the seams between boards. You can pre-mark each batten location with chalk lines to guide board spacing.
C. Chalk Layout Lines:
Use a chalk line to mark vertical lines for every board and batten, using a level to maintain plumb lines. Also mark top and bottom board height.
D. Create a Cutting Schedule:
Write down lengths of boards needed for each wall section. This helps reduce waste and keeps your workflow efficient.
Step 3: Install Vertical Boards
A. Start from a Corner:
Begin on one side of the wall. Install the first full board flush against the corner or trim. Make sure it is plumb by using a level.
B. Secure the Board:
Attach with galvanized nails or screws into the sheathing or furring strips every 16” to 24” vertically. Use at least two fasteners across the width for larger boards.
C. Continue Across the Wall:
Maintain a small expansion gap (⅛” to ¼”) between each board. This is especially important for wood boards that expand and contract.
D. Use Spacers:
Create or purchase spacers to maintain consistent gaps between boards. This saves time and prevents spacing errors.
Step 4: Install Battens
A. Cut Battens to Length:
Each batten should match the full vertical height of the wall or from the top of the base trim to bottom of the soffit.
B. Center Over Seams:
Line up each batten directly over the seam between two boards. Use a level again to ensure vertical alignment.
C. Fasten Securely:
Use two nails or screws per attachment point—one near each edge of the batten. To avoid warping or detachment, do not nail just along the middle.
D. Caulk Behind (optional):
Apply a thin bead of construction adhesive or caulk behind battens for added water protection (especially on fiber cement or engineered wood).
Step 5: Install Trim Boards
Proper trim installation seals edges and improves appearance.
A. Corner Trim:
Install trim boards vertically at each corner. Inside and outside corners both need 1×4 or 1×6 boards depending on your design.
B. Window and Door Trim:
Use horizontal and vertical trim to frame around windows and doors. Flash each component using flashing tape or metal drip cap to ensure no water penetration.
C. Base and Top Trim:
Install a water table trim or skirt board along the bottom of the wall to protect siding from splashback. Cap trim at the top can help shed water and visually finish the wall.
Step 6: Seal, Caulk, and Flash
Weather resistance depends on thorough sealing.
A. Caulk All Seams and Gaps:
Apply high-quality, exterior-grade paintable caulk between trim and siding, batten edges, window/door trim, and top/bottom joints.
B. Flash Around Openings:
Always flash above windows and doors to direct water away. Flashing tape or pre-bent aluminum works well.
C. Check Expansion Gaps:
Ensure there’s room for material expansion, especially with wood or fiber cement.
Step 7: Paint or Stain
Finishing is critical for both looks and protection.
A. Prime First:
Use oil-based or stain-blocking primer on all raw wood components before painting.
B. Apply Paint or Stain:
Use a high-quality acrylic latex exterior paint or an oil-based stain. Apply at least two coats, allowing appropriate drying time.
C. Don’t Forget Ends:
Make sure cut edges and nail holes are sealed or painted to prevent water ingress.
Troubleshooting & Common Issues

| Problem | Cause | Solution |
| Warped boards | Improper storage, excess moisture | Store wood flat and dry; seal ends and faces |
| Nail heads popping | Overdriven nails or fastener fatigue | Use ring-shank nails; avoid overdriving |
| Uneven board spacing | Poor layout or inconsistent measurements | Use spacers; chalk layout lines |
| Battens lifting | Inadequate nailing or warped wood | Nail on both edges; consider construction adhesive |
| Paint peeling | Lack of primer or moisture penetration | Use primer; repaint every 5–7 years |
| Water behind siding | No house wrap or poor caulking | Always install WRB; seal all penetrations |
Conclusion
Installing board and batten siding is more than a home improvement task—it’s a transformative project that boosts the character, curb appeal, and value of any property. While the process is labor-intensive and requires attention to detail, the result is a beautiful, weather-resistant façade that stands the test of time.
By carefully following each step—planning your layout, preparing the surface, installing with precision, and sealing meticulously—you can achieve professional-quality results, even as a DIYer. Patience, planning, and a dedication to doing things well the first time are crucial.
FAQs (Frequently Asked Questions)
Q: What is the lifespan of board and batten siding?
A: When properly installed and maintained, it can last 25–40 years, depending on material and climate.
Q: What’s better—nailing or screwing board and batten siding?
A: Screws offer stronger, longer-lasting fastening, but nails are faster. Use corrosion-resistant fasteners in both cases.
Q: Can I install board and batten over existing siding?
A: It’s not recommended unless the existing siding is flat, secure, and dry. For best results, remove old siding.
Q: Is board and batten suitable for environments with a lot of moisture?
A: Yes, especially when paired with a house wrap, caulking, and sealed wood like cedar or treated lumber.
Q: Is it possible to utilise board and batten siding indoors?
A: Absolutely! It’s a popular choice for feature walls in living rooms, bathrooms, and bedrooms.
Q: What is the installation cost per square foot?
A: DIY project might cost anything between $1.50 and $4.00 per square foot depending on material. The cost of a professional installation is between $7 and $12 per square foot.
Stay ahead with the latest house related news and innovations at Tech.Mex.com.